There is one thing in my life that I can not live without: my planner. My planner is basically my brain on paper. If I lost my planner I literally would go insane!! NO joke. I would have no idea of what to do or where to go. So yes, I'm dependent on it. I'm not a huge fan of being dependent on anything, but I love being organized and on task. It may a problem, but I've totally embraced it. My friend Sarah introduced me to Erin Condren planners about a year ago. I immediately was drawn to their colorful and personalized life planners. It really makes organizing fun! I've been using the planner for 2 weeks now and I absolutely love it.
Right now, the life planners are 40% off so its the right time to try it! You can find the Erin Condren website
here. From my knowledge, you can personalize all their products. They sell planners, labels, stationary, and other organizational products. You'll have to check out their website to see them all!
Above, you can see a picture of the life planner I chose. There are so many covers to choose from. I believe you can put your own picture on any of the covers to make it even more personalized. I love the colorful paisley print that I chose. The company is coming out with new patterns this July which I am excited to see! I really love preppy graphic designs so I would love to see more of that!
The inside cover is shown below.
Throughout the planner there are motivational quotes and sayings which I absolutely love!
The beginning of the planner leaves you room to keep track of anniversaries and birthdays.
There is also a full year calendar.
The majority of the planner is divided up by monthly tabs.
Each month begins with a calendar, which is great for planning out
events. The majority of the pages also have a 'to do' list and 'goals
list' in the margins which you can see below.

Each day (Monday through Sunday) has its own column. The column is divided up between morning, day, and night. I personally believe the columns are a tad narrow and the headings take up too much room but thats just me! Below you can see the bookmark/ruler that they provide with the planner.

In the back of the planner, there are plenty of sheets of lined and plain paper for notes.


There is also a page to keep track of important numbers.
My favorite part of the planner are the stickers that they give you! They provide you with rectangular stickers to mark important events. I wish you could customize these too, but for the most part I can use them just the way they are.
In back, there is also a folder to keep extra sheets and stickers.
For an extra cost, you can create your own personalized stickers! I was so excited about this! I made stickers to mark birthdays and important events. They are super easy to make. You just upload your favorite pictures on the erin condren website! They also give you blank colorful rectangle stickers that you can write on.
Behind the folder is a 2 year calendar and a plastic ziploc case where you can keep other nick nacks. The company also included personalized labels in the plastic case which I am sure I'll be using to mark other notebooks and books.
I also bought personalized stationary which matches the pattern of my planner. The back of the note pad is sticky so you can attach it to the back cover of the planner.
For an extra cost, I also bought colored pens (so I could color code my planner of course!) and a pen holder which attaches to the planner. (Shown in the first picture!)
I hope this gave you a good overview of the planner. I love it overall and I hope you will too!

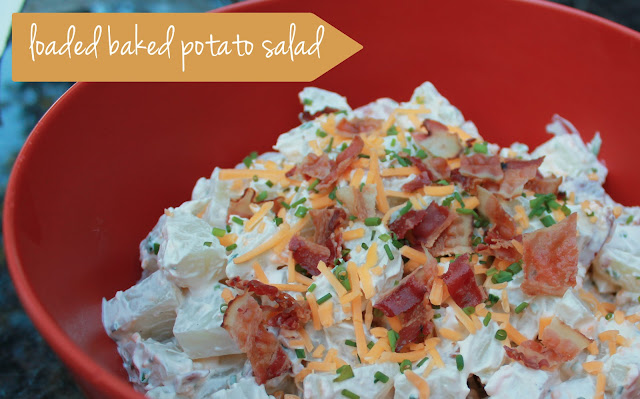
 Potato salad is most definitely my favorite dish at a summer get together. I am always excited to try a new recipe! I found this one on pinterest and I just could not pass it up! At your next cookout or BBQ I would most definitely recommend making this potato salad! It tastes exactly like a loaded baked potato...bacon, cheese, potato, sour cream...you just can't go wrong with that!! Its yummy yummy! I served it chilled though the originally recipe served it warm so you can do whatever you prefer!


